


Updated at: 2022-12-09 03:49:50
View the operating system bit with the command bootinfo-y in root user. If it shows 64, it is the 64-bit operating system. Only 64-bit AIX is supported currently.

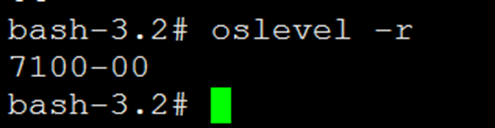
View the operating system version with the command oslevel –r in root user. Currently AIX 5.3, 6.1 and 7.1 are supported. They share the same client installation package.
To install,
Step 1 Log in to the server in root user and copy the software installation package to the specified location.
Step 2 Unpack the package to * .tar with gunzip package name, for example,
gunzip AnyBackupClient-AIX_5.3_power64-7.0.13.0-20201017-release-zh_CN-942.tar.gz
Step 3 Unpack with tar -xvf package name, for example,
tar -xvf AnyBackupClient-AIX_5.3_power64-7.0.13.0-20201017-release-zh_CN-942.tar
Step 4 Enter the unpacked directory AnyBackupClient/ClientService, and input the installation command ./install.sh. The installation steps after confirming the copyright information are shown in the following figure.

Mind the following:
§ During the client installation, the installation program will check whether the installation conditions are met. If not, manual adjustment shall be made or auto adjustment shall be selected. After the adjustment completes, the installation job continues.
§ Spaces are not allowed in the installation path.
To install,
Step 1 Select y to confirm the copyright information.
Step 2 Fill in your own IP address. For a server which has multiple NICs, data can be backed up through the designated NIC, and this IP address will be displayed in the backup server.
Step 3 Fill in the VIP address of the backup server.
Step 4 Enter 1 or 2 to select the language (Chinese or English).
Step 5 The SSL option can be selected by entering y/n. If click Enter directly, it will be y by default.
Step 6 Enter y or n to select whether to support other database types. For ordinary clients, press n. For ordinary database types, press n. For special databases including Oracle and DB2, select y.
Step 7 Make sure all the selections are correct, and then enter y to start installation. If not, enter no to exit and run the installation again.
Step 8 After installation completes, run /etc/rc.d/init.d/ABClientService status to check whether ClientService is normal. (For installation via ksh, run ksh /etc/rc.d/init.d/ClientService status).

Log in to the console as a system administrator and the related IP can be viewed in Resources > Client > External Client. If the status is online, the installation succeeds.
View the operating system version with the command oslevel –r in root user. Currently AIX 5.3, 6.1 and 7.1 are supported. They share the same client installation package.
To install,
Step 1 Log in to the server in root user and copy the software installation package to the specified location.
Step 2 Unpack the package to * .tar with gunzip package name, for example,
gunzip AnyBackupClient-AIX_5.3_power64-7.0.13.0-20201017-release-zh_CN-942.tar.gz
Step 3 Unpack with tar -xvf package name, for example,
tar -xvf AnyBackupClient-AIX_5.3_power64-7.0.13.0-20201017-release-zh_CN-942.tar
Step 4 Enter the unpacked directory AnyBackupClient/ClientService, and input the installation command ./install.sh. The installation steps after confirming the copyright information are shown in the following figure.
Mind the following:
§ During the client installation, the installation program will check whether the installation conditions are met. If not, manual adjustment shall be made or auto adjustment shall be selected. After the adjustment completes, the installation job continues.
§ Spaces are not allowed in the installation path.
To install,
Step 1 Select y to confirm the copyright information.
Step 2 Fill in your own IP address. For a server which has multiple NICs, data can be backed up through the designated NIC, and this IP address will be displayed in the backup server.
Step 3 Fill in the VIP address of the backup server.
Step 4 Enter 1 or 2 to select the language (Chinese or English).
Step 5 The SSL option can be selected by entering y/n. If click Enter directly, it will be y by default.
Step 6 Enter y or n to select whether to support other database types. For ordinary clients, press n. For ordinary database types, press n. For special databases including Oracle and DB2, select y.
Step 7 Make sure all the selections are correct, and then enter y to start installation. If not, enter no to exit and run the installation again.
Step 8 After installation completes, run /etc/rc.d/init.d/ABClientService status to check whether ClientService is normal. (For installation via ksh, run ksh /etc/rc.d/init.d/ClientService status).
Log in to the console as a system administrator and the related IP can be viewed in Resources > Client > External Client. If the status is online, the installation succeeds.
< Previous:
Next: >